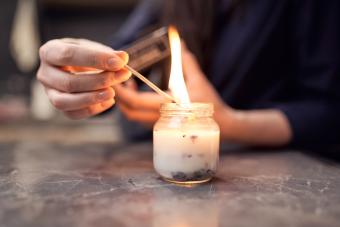
Wicks are an essential part of candle making. While commercially prepared wicks are available in a wide range of sizes, including many specialized candle wicks, making your own gives you the flexibility to make custom wicks to fit specialty candles in varying sizes. Just follow these easy instructions to create wicks for your homemade candles.
How to Make Candle Wicks
Use 100% cotton twine for best results. Soaking the twine in a solution of water, salt, and boric acid strengthens the wick and helps it to burn steadily. You can make wicks without this solution, but they will burn faster and can cause your candle wax to melt unevenly.
Supplies Needed
- Undyed cotton twine
- Scissors
- Tongs (or anything you can use to pull the wicks out of the warm wax)
- Clothespins for hanging wicks to dry
- Small pair of needle nose pliers
- Enough wick tabs for the number of wicks you want to make (optional)
- A small bowl
- 2 tablespoons of salt
- 4 tablespoons of boric acid powder (available at many pharmacies and hardware stores)
- 1.5 cups of warm water
- A double boiler
- Whichever type of wax you use to make your candles (beeswax, soy, paraffin)
Steps
- Decide how thick and how long of a wick you'll need. Small candles burn well with single wicks while medium candles require a wick made from three strands of twine braided together. Larger candles may need two or three braided wicks spaced out to help the candle burn evenly.
- For a single wick, measure the twine so that it will be about three inches longer than the height of your candle, and cut the twine. If you plan to braid a wick, cut three equal lengths of twine that are approximately four inches longer than the height of the candle the wick will be used for. You'll eventually trim your wick down to the correct size once your candle is made, but this way you won't wind up with one that's too short.
- Combine the warm water, salt and boric acid powder in a bowl and stir to dissolve. Soak the lengths of twine in the solution for at least eight hours or up to 24 hours.
- Remove the twine from the solution and let dry completely (this can take up to 48 hours). Hang or drape the wicks so that air can circulate around them to speed up drying time. You'll notice that small white crystals will form on the wicks as they dry - these are harmless, but you can gently brush them off if you like.
- Using a double boiler, slowly melt some of your chosen wax. You'll need enough to cover your strings/braid, and you can remelt any leftover wax the next time you want to make more wicks.
- Soak the twine for about a minute to coat. Note that the twine doesn't really "absorb" the wax, so longer soaking time isn't necessary. (An alternative method is to simply grip the twine with tongs and dip it into the wax several times to coat the twine and then hang it to dry.)
- Using tongs to protect your fingers, pull each piece of twine out of the wax, allow it to drip for a moment to remove excess wax, and then hang it to cool. As the wax begins to cool and before it hardens, you can gently straighten the wick so it is completely straight when the wax is finally firm.
- Allow the wax to set and harden.
- If you wish to add a wick tab to the bottom of your wick, thread the wick into the center opening and use the needle nose pliers to pinch it shut.
- Store the finished wicks in a cool, dry place.
This video shows you how to mix the solution and soak your wicks. The creator of the video attaches paper clips to her wicks to make hanging them to dry easier.
Candle Wick Tips
Just like candle making itself, making your own wicks can take some trial and error to get wicks that burn well with your candles. Keep these tips in mind as you test out new homemade wicks.
- If you're making dipped candles, there's no need to let the wick dry completely after the first dip into the melted wax (step six above). Follow the instructions up to step four. Then, use plain wax or wax that has been colored and/or scented, and dip the wicks as you would with store-bought wicks.
- Tea lights, votives, taper candles, and even tall, thin pillars can use single-strand wicks. For wider or larger candles, braid three or four strands of twine together before soaking. Generally the larger the candle, the thicker the wick should be.
- Very wide candles with lots of surface area should use more than one braided wick. Space them out so that the wicks are evenly placed around the candle.
- You can substitute Borax powder for the boric acid in the solution if you'd like. The only potential difference is that the flame may burn with a slight bluish tint when using Borax.
Plan Ahead
Creating handmade candle wicks is a useful technique for a candle maker who wants a greater degree of control over the candle making process. Since you'll need plenty of time between steps to allow the wicks to dry, it's best to plan ahead. Make lots of wicks in different sizes so that you'll have plenty on-hand and ready to go whenever you want to make new candles.